
You get the email on a Tuesday morning. A regional cinema is doing a 10th-anniversary retrospective, and they want to screen your “first feature.” They need a teaser for Instagram, a clean 30-second clip for their pre-show, and a file without the 2016 festival dates.
You dig out your old hard drive, and it’s still there: the original promo. And yeah, it looks exactly how old it is. Low-res, those festival dates literally burnt into the frame, and of course a big watermark right over the one shot you actually like.
You can’t reshoot any of this. The footage is what it is. You have to make it watchable again before you send it out. The better way isn’t to throw filters at it. It’s to fix it in the right order – remove first, restore second, rebuild last. Do it backward, and you just bake the problems in. Here is the workflow that actually works…
Step 1: Find the real original before you fix anything
Don’t jump straight to cleanup. First, see if you have a better source — original project file, ProRes export, or layered timeline. If you do, use it. No cleanup tool beats re-exporting from source.
Most of the time you DON’T. So you have to work with the flat, burned-in file.
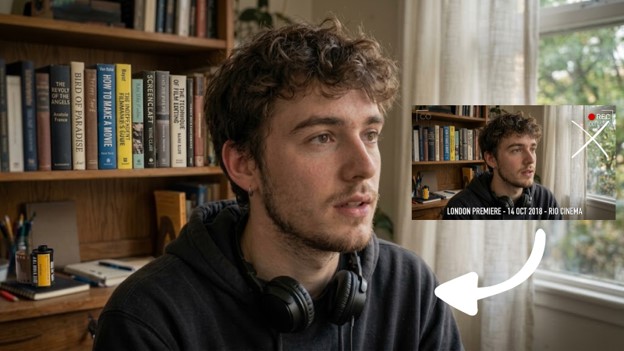
We will be using the test clip you can see in the screenshot below. It is an H.264 file with a few typical problems that make old promos unusable now:
- Old premiere dates and venues in the lower third
- A festival laurel block from 2017-2019 that is no longer accurate
- Old production company bug in the corner, or a temp distributor watermark from a market
- A “Festival Screener” or “For Your Consideration” overlay

Step 2: Remove old campaign marks first
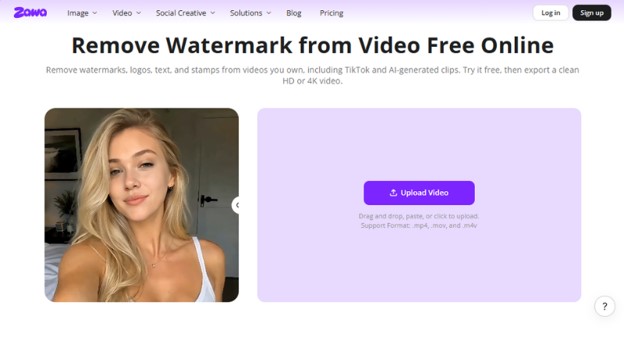
For logos, bugs, and semi-transparent watermarks, run your file through Zawa’s video watermark remover. It works best for small marks that don’t cover too much detail, though results can vary with camera movement and complex backgrounds.
The process is simple. Upload your video. Zawa supports common formats such as MP4, MOV, and M4V, so you can work with most older promotional exports without converting them first.
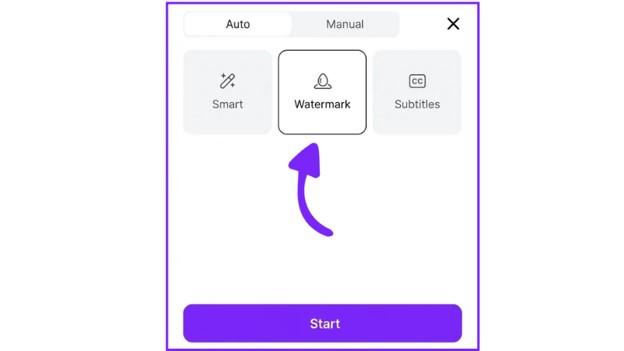
Once video is uploaded, you have to select mode from three options shown on the right side of the panel. You will see Smart, Watermark, and Subtitles. Each does a slightly different job.

- Smart is for general cleanup
- Watermark is specifically for logos, bugs, and those semi-transparent marks that sit in a corner
- Subtitles is for big, burned-in text blocks like lower thirds
For this first pass, select Watermark. Zawa will auto-detect the static marks – in our test file that’s the “CO” bug top left and the “REC 00:15:42” stamp top right. Hit Start and let it process.
Here is what you get on the first pass:

CLEAN. The corner bugs are gone, the background detail is rebuilt, and the interview itself is untouched. Export this pass clean. Check it on a TV, not just your laptop.
Step 3: Remove burned-in promotional text as a second pass
For the second pass, use the file you just exported and upload it to Zawa again.
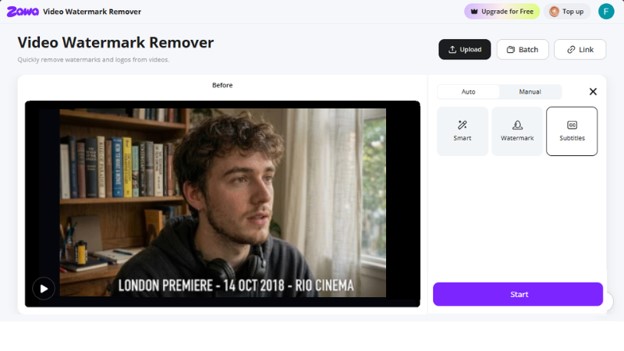

Within seconds, Zawa strips the entire lower third and rebuilds the background underneath. You can see the results immediately in the preview. The white text disappears, but everything behind it stays. The person’s hoodie detail is still there, the shelf line is still sharp, no smudged rectangle left behind.
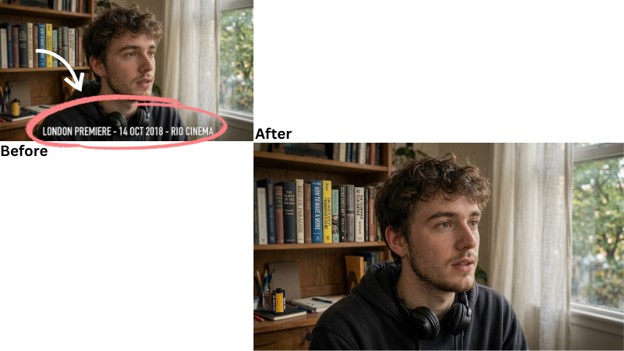
Why didn’t we do watermark removal in one pass? Why is a second pass needed? The thing is, the video has two types of watermarks. One is a logo, and the other is text-based marks.
Now, if you use a watermark removal that does remove both issues in one pass, chances are you won’t get clean results. That’s why you need a tool that can handle them separately, and Zawa provides exactly that: the Watermark and Subtitles options are designed to solve two totally different problems.
While Watermark searches for tiny, semi-transparent marks hiding in corners, Subtitles searches for large contrast blocks at the bottom of the image.
Step 4: Restore, don’t just sharpen
This is the step everyone skips. You now have a clean 720p file. If you just export that for a cinema screen or Instagram 1080×1350, it will look soft.
Correct order:
- De-noise lightly first. Old H.264 promo exports have blocky compression noise. Removing it before upscaling prevents you from upscaling the noise too.
- Upscale to 1080p or 4K. Use your NLE’s upscaler or an AI upscaler, but feed it the clean file. It has a much easier job when it’s not trying to sharpen letters and watermarks at the same time.
- Re-grade very subtly. Don’t crank saturation. Old promos were often graded too warm for YouTube 2016. Just bring back a little contrast and skin tone.
Step 5: Add the new campaign in your editor
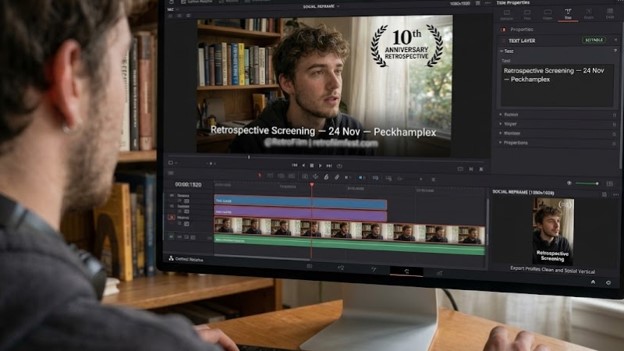
Lay in current information on a separate graphics layer. That way next time a cinema, distributor, or grant asks for a clip, you’re not stripping 2018 text again. You just pull the textless master you already made.
You can do this in Premiere Pro or DaVinci Resolve by keeping the video on V1 and placing titles and graphics on V2 and V3. Save a textless master alongside the finished promotional version. Just two files and five more minutes of your time will save you hours later.
Disclaimer: This process should never be used to remove actor or crew credits, licensed music credits, or another filmmaker’s watermarks without permission. We don’t encourage removing ownership marks or credit details that protect someone’s work. The steps above are intended for outdated campaign elements on footage you own or have permission to edit, such as expired screening dates, old promotional logos, and temporary campaign overlays.